Well, sometimes you don’t have to. Modern photographic processing software will
do a lot of what used to require physical filters. There are a few types of filters that should
be in the landscape photographer’s bag, though.
First, the circular polarizer (CP) filters. The CP does things for you that Photoshop
just can’t do.
Typically we think of polarizing filters as tools to
make a blue sky darker. This it will do,
though what’s really happening is an increase in contrast. This effect of the polarizing filter is greatest
when the sun is at ninety degrees to the axis of the camera, that is off one of
your shoulders.
When the sun is behind or directly in front of you, you won’t
see much effect. With wider-angle lenses
(you can start seeing this at 30-40mm) there’s an uneven effect across the sky
which can look quite unnatural.
Sometimes that’s hard to see on your LCD screen. When in doubt, shoot the same image with
varying degrees of polarization.
The CP can do much more for you, though. For example it can minimize or maximize
reflections in water and it can reduce unattractive shine on foliage.
It is wisest to remove the CP when you don’t have a
specific purpose in mind for it, as it can reduce light transmission through
the lens by a full stop or more.
The second group of filters you won’t want to be
without are neutral density (ND), a subset of which is graduated neutral
density filters (GND), also known as split neutral density filters. I’ll get back to that.
 |
| Grand Falls, Little Colorado River without ND Filter (1/20 second shutter speed) |
 |
| Grand Falls, Little Colorado River with ND Filter (10 second shutter speed) |
The concept of ND filters is simple; they’re dark. “Neutral” in this case means that they don’t
alter color. Sometimes the goal is to use a slower shutter speed than is
possible without a filter. Commonly we
want to do this to “slow down” or smooth out moving water. The effect is easy enough to do at dawn and
dusk, when the light is low. To create
the effect under brighter conditions, though, we need the help of NDs.
Longer exposures of moving clouds can be lovely,
too. These filters are available to
screw in or as flat plates which are used with a holder.
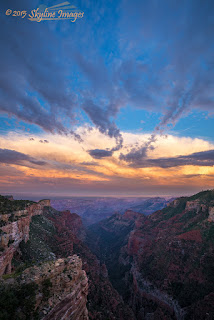
GND filters are almost always used as flat plates in
holders. They’re useful for scenes which
have a fairly abrupt transition from light to dark areas, like a bright sky and
much darker land.
 |
| Grand Canyon, without GND Filter |
While many argue that
bracketing exposures and combining them using HDR (“high dynamic range”)
software can take the place of GNDs, there are still times when it is desirable
to shoot the image properly in one exposure. You will find that this is a controversial
point.
GNDs are made with soft or hard
transitions, the choice depending upon the requirements of the scene. The reason that screw-in GNDs are not
commonly used (though you’ll see them for sale) is that the transition, and
therefore the horizon, will fall in the center of your composition. Occasionally composing a scene so that your
horizon is centered may be desirable, but the vast majority of good
compositions will feature horizons above or below center. The flat filter in a holder can be adjusted
up and down as desired. In short, don’t
use screw-in GNDs.
Sometimes GNDs create artifact that must be
corrected (or in some cases cannot be).
For example, if your scene includes trees which extend in front of the
sky, darkening them along with the sky can look unnatural.
One last thought; buy good ones. There’s little point in putting an optically
poor filter in front of your sharp, state-of-the art lens. With good care, they should last a lifetime.
You might want to check out some of the innovative
and space-saving filter holders from Mindshift Gear. I love my filter hive.
As always, thanks for the visit. I hope to see you out there.


